Category: IoT
Raspberry Pi: Attach A Sensor To Raspberry Pi and Receive Mobile Alerts
In this particular scenario, my goal was to attach a motion sensing device to Raspberry Pi Zero W and have it send me alerts. Now that this basic functionality is achieved, I can modify and reuse it as I wish.
I used the following:
Hardware:
-
Raspberry Pi Zero W
-
PIR motion sensor (EMY 5 X HC-SR501 Adjust Ir Pyroelectric Infrared PIR Motion Sensor Detector)
Software:
-
(Operating system: Debian)
-
Programming Language: Node.js
-
Communication medium: IFTTT.com
STEP ONE: ATTACHING THE PIR
This PIR component has three pins (Power, Output, Ground.) Using female-to-male cables, I attached as follows:
|
PIR PINS
|
RASPBERRY PI GPIO PINS
|
|
POWER
|
PIN 2 (5v)
|
|
OUTPUT
|
PIN 7
|
|
GROUND
|
PIN 6
|
STEP TWO:
-
If you don’t have one already, set up an account at ifttt.com . Personally, I do not recommend this site for confidential actions but it is fun to play with!
-
Navigate to “My Applets” and click on “New Applet”
-
Click the “Plus” image and you should be taken to a page “Choose a service”
-
Search for “web” and choose “Maker Webhooks”
-
Select “Receive a web request” as a trigger
-
Enter the following tag: “motion_detected” to create a trigger
-
You should be re-directed to a page that reads “If (webhook) then” Plus sign.
-
Select the “SMS” service.
-
Select “Send me an SMS”
-
Enter your tag “motion_detected” to create an action and then add the phone number for SMS
-
You should receive a special “key”. Save this.
-
Review changes and save.
STEP THREE: INSTALLING SOFTWARE ON PI:
-
Create a folder for project and ensure internet is connected.
-
Open a terminal window, type the following:
-
Test to see if Node.js is installed)
Node –v
-
If no version is returned or version is below v6, get latest:
curl -sL https://deb.nodesource.com/setup_7.x | sudo -E bash –
-
Once version is downloaded, then install:
sudo apt-get install –y nodejs
-
Test to see if latest version of Node.js is installed:
Node –v
-
Open code (pir_motion_trigger.js) in text editor. You will change the following lines of code to customize for your IFTTT applet:
// IFTTT data
var key = “enter key here”
var eventName = “motion_detected”
-
Save code and close
-
Once again, open a terminal window and navigate to your folder.
-
Type the following:
sudo node pir_motion_trigger.js
-
Wait a minute or two then wave your hand in front. Soon you should get a text message.
NOTE: This particular model of PIR has the ability to adjust sensitivity for motion delay and distance. You can manipulate by adjusting the two yellow/orange screws or programmatically.
Raspberry Pi: Remotely Connect To Raspberry Pi From Windows
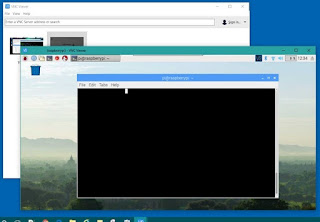
Remote Desktop Connection: Connecting one computer to another gaining the ability to take control of the remote computer.
The Raspberry Pi Zero can be especially difficult to program for Windows users. The tiny microcomputer runs on a Linux-based operating system. Hooking up a small computer to an external monitor is not a problem but adding keyboard or mouse can get painful without the proper resources and experience. Instead, below is what we can do.
First, an external monitor and keyboard will be needed for the initial setup. If you haven’t done this, then there is good documentation here.
Second, your main PC will need to be on the same network as your Raspberry Pi. On the Pi, you will need to get it’s IP Address. This can be done by opening the command terminal and typing “ifconfig” This should return a list of network information. Locate a line for “wlan*” and in here you will jot down the address following the entry “inet6 addr: ” It should look something like: 192.168.1.12. You will use this address to connect. Note that your Raspberry Pi will most likely want you to enter UserId and Password.
Third, follow these well-written instructions here to walkthrough the process: https://www.raspberrypi.org/documentation/remote-access/vnc/
Arduino: Part II: Tools
Code is usually involved in creating your Arduino project. You are going to need a piece of software that will take your code, compile it, and then upload it to your Arduino. This type of software is known as an “Integrated Development Environment (IDE). Here are some free options:
- Arduino IDE: This is the most simple IDE and I recommend for absolute new starters. Because the Arduino has more capability to support analog functionality, the most basic code will have one format only — 1) a setup code block and 2) a loop code block. Not allot of room for error here.
- Atmel Studio: I have not tried this software but it looks like it has potential. I intend to try it at some point.
- Visual Studio Community Edition: This is the reason I haven’t tried Atmel Studio. I’ve been using Visual Studio most of my life and, despite my moaning, I love it. Especially since it has gone open-source, it’s not limited just to core Microsoft languages.
- Visual Studio Code: This is a nice light-weight edition from Microsoft. It’s very simplistic, has functionality for many languages. The only reason I don’t use it much is because I’m usually on more complex projects and haven’t had time for a learning curve. Since it seems more lightweight, I predict I’ll be using it more in the future.
ARDUINO GOTCHA:
- Arduino will frequently come out with new IDE builds. If you go to their website, you will see that you can even get the latest hourly builds. Don’t do this. Whatever lesson you are following or project you have going is not going to contain builds from the last hour and might break your code. Stick to the latest solid build that most people are using and keep it that way for a while.
Arduino: Part III: First Project Basics
Using the Arduino IDE — a quick skinny overview:
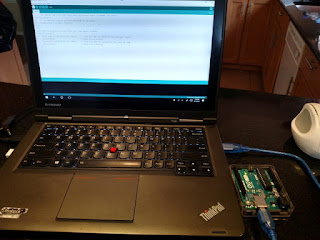
- I have an Arduino Uno, have attached it to my PC via USB port, and opened that IDE:
- In the IDE, I navigate to Tools –> Boards –> Select the version of the Arduino being used:
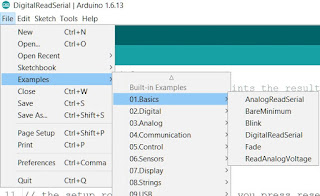
- The Arduino IDE comes with some very basic code examples (aka, sketches.):
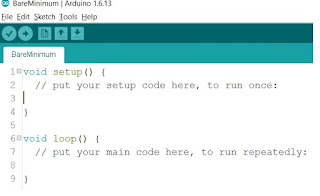
- The bare minimum of a code example will contain a method for “setup()” and an action method for “loop()”
- A very basic sketch to test your board is the “Blink” example. Open this example.
- In the top left corner of the application, click the checkmark icon to compile the code and if there are no errors you will see similar to the following:
- Now you can upload the code to the Arduino by “Arrow” icon. This is a common problem I run into where my Arduino is not registering on the proper port:
- If you click on the “Magnifying glass” icon or navigate to Tools –> Serial Monitor –> click to open an interface that shows communications to the Arduino. In my scenario, the IDE is looking to “COM3” to find my Arduino. If I open Windows Device Manager, I can see that it is registering on port “COM4”:
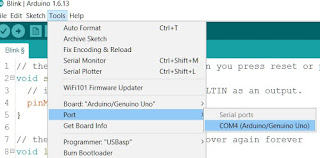
- To remedy this, I navigate back to the IDE, click Tools –> Ports –> and select “COM4” as my port.
- If you don’t have the above, or any other error, when you upload your code, you should see the following result and will notice that the Arduino now has the blinking light that you programmed.
avrdude: ser_open(): can’t open device “\.COM3”: The system cannot find the file specified.
avrdude done. Thank you.
Problem uploading to board.
avrdude: verifying …
avrdude: 928 bytes of flash verified
avrdude done. Thank you.
